
Graveyard Keeper 2 Automation: The Three-Layer Zombie Chain
Three layers: corpses become zombie workers, tools make them specialise, and couriers plus underground belts move goods. Get hauling working before scaling.

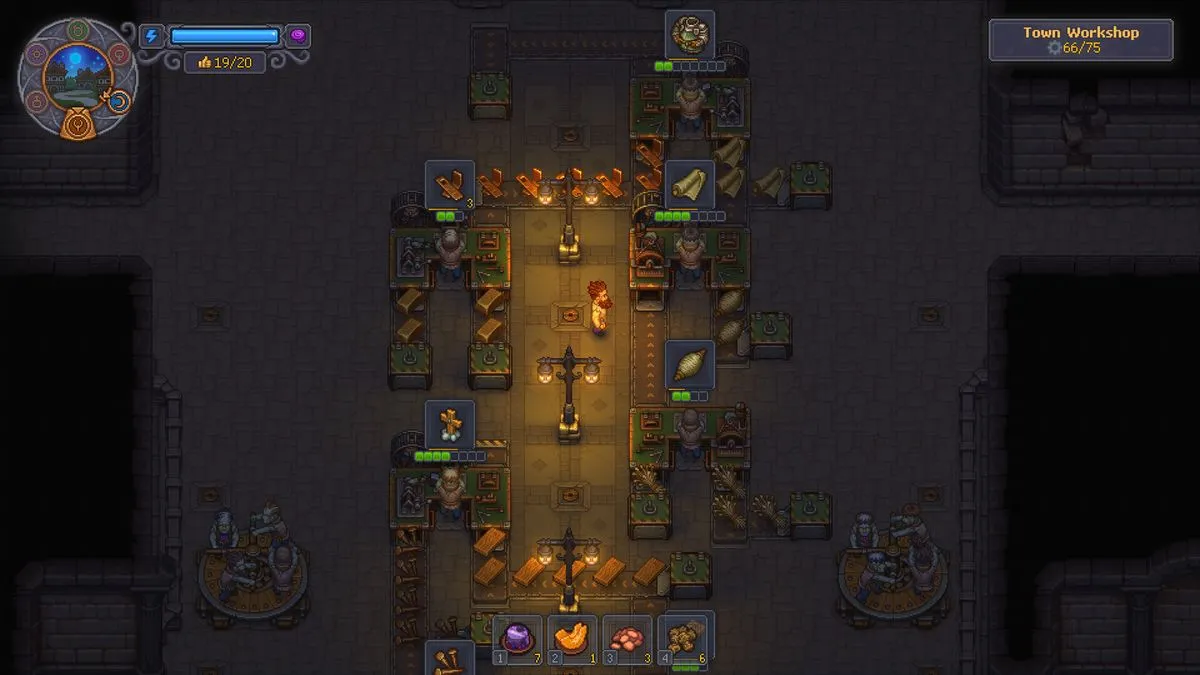
In one sentence: Graveyard Keeper 2 automation has three layers. Reanimation liquid turns corpses into zombie workers. Tools let them specialise. Couriers and underground belts move things between buildings.
The official trailer sums the loop up as “Connect it all. Chain your production. Automate everything.”
If you only take one piece of advice, take this: get the hauling loop working before you scale output. No amount of zombie labour helps if the courier step breaks, because the whole production area stalls.
Layer one: where zombies come from
Zombies are not a new invention for the sequel. The official devlog on 20 May 2026 states the origin outright: “Zombies were first introduced in the first DLC for the original Graveyard Keeper”. The first expansion, Breaking Dead, added them because the graveyard simply had too many chores.
The sequel promotes them from helper to core system.
The demo shows three named items: reanimation liquid, a zombie collar, and a resurrection note. A note in the Inquisitor’s room describes the principle: “A strong electrical charge appears capable of restarting a corpse. The body may walk again.” In practice, you resurrect corpses into zombies.
There is also a design that flips the original entirely. The first game had you chasing white skulls. The sequel has you chasing red corruption.
The official wording is “The more corrupted a zombie is (red skulls), the better skills it can develop”. More corruption means better trainable skills.
To get high-corruption corpses, you make townsfolk comfortable enough that they produce sinners. If a body is not corrupt enough on its own, you can combine the most corrupted parts from different corpses and finish with corruption embalming.
Layer two: give zombies a specialism
The official trailer explains the split bluntly:
Give the good ones better tools. They learn, they specialize. That one was a lumberjack. Still is. Labor costs, zero. Paid leave, zero. Complaints, zero.
Translation: give the good zombies better tools and they learn, then specialise. A zombie that was a lumberjack is still a lumberjack.
The devlog adds one more detail: each zombie has its own skill progression and may even earn a name after ten years of loyal service.
What that means in practice: do not spread your tools evenly. Give them to the zombie already doing that job so the specialisation stacks.
Layer three: the three automation facilities
| Facility | What it does | What is confirmed |
|---|---|---|
| Zombie workers | Staff production buildings in place of manual crafting | The devlog says they “don’t just use regular workbenches… they can also efficiently operate semi-automatic machines in underground factories” |
| Courier | Moves items between buildings | Reviews record exactly how it fails in the kitchen |
| Underground belts | Long-distance transfer of materials and goods | Reviews describe building underground “to transfer goods where you want them to go via conveyor belts”, unlocked “a good chunk of the way into the game” |
The trailer’s own order is Gather, craft, build to Unlock new workshops, new machines to Connect it all.
Get production running first, then connect it.
What to automate first
This order follows system dependencies. It is not an official guide.
- Gathering points for wood and stone. Everything you build starts here, and gathering eats the most time.
- Repeat processing at the wood and stone workbenches. This is the highest manual workload for the most immediate payoff.
- The courier loop. Chain raw materials and finished goods into a closed camp loop. Production only becomes stable once this works.
- Underground belts. Once unlocked mid-game, use them for long-distance transfers.
Doing it backwards has a very concrete cost. Reviews recorded a kitchen where the courier did nothing at all: “the mover should take completed items to the chest, but they won’t. They’ll simply stand up and get frozen”. That single failure shuts down the whole area.
Known problems and what to do
Two reproducible faults showed up during the demo and review period:
- Couriers freeze. In the kitchen and similar rooms, the hauling zombie stops moving and finished goods never reach the chest.
- Combat units get stuck. In battle, some zombies snag on scenery and stand there taking hits without fighting back.
What to do: reassign the stuck unit, switch the critical step back to manual for now, and watch the post-launch patch notes.
These reports come from the review build before release, so they may already be fixed.
Still unannounced
- The reanimation liquid recipe. Never published.
- The exact rules for zombie quality and skills, and the belt unlock conditions.
- How to cancel a queued production job. Nothing official exists, so this page does not guess at a keybinding.
To understand the overall pacing first, go back to the beginner guide. For what zombies do in battle, see combat and the undead army.
Sources
- Official devlog “Where Zombies Feel at Home” (20 May 2026): https://store.steampowered.com/news/app/4358690/view/1833334318566521
- Steam store page official description: https://store.steampowered.com/app/4358690/Graveyard_Keeper_2/
- Official Demo Launch Trailer subtitles (publisher’s channel): https://www.youtube.com/watch?v=FZU9FI2zRSs
- Full demo playthrough recording: https://www.youtube.com/watch?v=BhyeZoyTz6U
- DualShockers review (14 September 2026, belts and faults): https://www.dualshockers.com/graveyard-keeper-2-review/
- Original
Breaking Deadexpansion summary: https://en.wikipedia.org/wiki/Graveyard_Keeper